Page History
Review the Additional Information for using Salesforce Connector.
On this page:
| Table of Contents |
|---|
Salesforce Security Token
| Anchor | ||||
|---|---|---|---|---|
|
You are given a security token the first time you log into Salesforce. Don't know your security token?
To reset it:
- Click on your username in the top right section
- Choose "My Settings" from the menu
- Click "Personal"
- Click "Reset your security token" and follow the steps provided
This steps will send to your user email the info with the "Security Token" like:
Salesforce WSDL
The follow steps will provide you the information to get the Enterprise WSDL and generate the necessary jar file for the connector
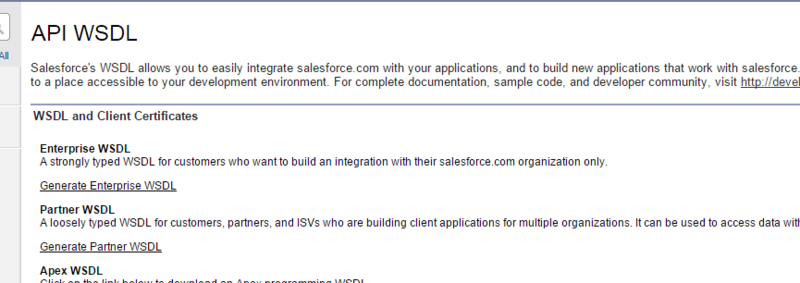
To get the Enterprise WSDL file, please follow the next steps:
- Click on Setup in the top right section.
- Click on Build/Develop in the left menu.
- Click "API".
- Download the Enterprise WSDL in "Generate Enterprise WSDL".
For complete documentation, sample code, and developer community, visit Salesforce Developer.
To generate the Enterprise Jar file, please follow the next steps:
- Generate and download WSDLs.
- Download the last version of force-wsc JAR. (link here)
- Download the last version of stringtemplate JAR. (link here)
- Download the last version of antlr-runtime JAR. (link here)
- Generate Jar file using this instruction:
| Info |
|---|
java -classpath force-wsc-XXX.jar;stringtemplate-XXX.jar;antlr-runtime-XXX.jar com.sforce.ws.tools.wsdlc enterprise.wsdl enterprise.jar |
Salesforce Chatter App
The follow steps will provide you the information to create the necessary Chatter App.
In your Sales Force Server, go to the Setup page
Go to Build / Create / Apps
In this new page, click on New Connected Apps
Fill the Basic Information:
- Connected App Name
- API Name
- Contact Email
In the API (Enable OAuth Settings):
- Check "Enable OAuth Settings"
- Set the "Callback Url"
- Select the "Selected OAuth Scopes"
- Save the application
- In the next screen you can copy the "Consumer Key" and the "Consumer Secret" information.
Salesforce Consumer Key and Consumer Secret
Once you created your "Connected App" you can get the "Consumer Key" if you go to Setup / Build / Create / Apps and select your connected app.
- Copy the "Consumer Key"
- To get the "Consumer Secret" click in "Click to reveal"


