Page History
Step 1: Install Java JDK
The version of Java you should use depends on the Aspire version you are targeting to:
- Aspire 3 and up requires to run at Java 1.7 and above.
...
Aspire
...
is
...
Download and install the latest version of the Java JDK appropriate for the system that will run Aspire:http://java.com/en/download/manual.jsp
...
a
...
- The Aspire framework itself does not use up that much memory (100mb or so). But some applications may store big hash tables to improve performance, so it's best to have the 64 bit JVM (Java Virtual Machine), just in case you need it someday.
...
- Open up a new DOS command-shell (go to the start menu, and enter "cmd" where it says "Run" or "Search for Programs", and then execute the cmd.exe program).
At the prompt, enter the following, then press the Enter key: java -version
Success is indicated when version information is returned.
...
- This is needed by the Maven command-line tool described below.
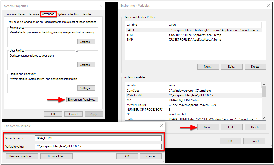
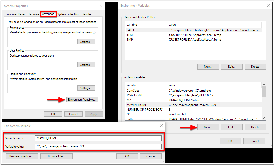
- Open up your control panel
- Go to the "System" control panel (may be inside the 'System and Security' category)
- Open up the "Advanced System Settings"
- Go to the "Advanced" tab (may already be selected)
- Click on "Environment Variables"
- Click on "New..."
- Enter "JAVA_HOME" as the "Variable name:"
- Locate the directory within your Program files where java was installed. Enter this directory name as the "Variable value:"
| Code Block | ||||
|---|---|---|---|---|
| ||||
> java -version
  java version "1.7.0_79"
  Java(TM) SE Runtime Environment (build 1.7.0_79-b15)
Java HotSpot(TM) 64-Bit Server VM (build 24.79-b02, mixed mode) |
Step 2: Install Maven Command Line
| Info |
|---|
If you are running Aspire with the Quick-Start Distribution from the aspire binaries, you can skip this part, otherwise If you are using the Maven Archetype for downloading Aspire you must follow this section. |
Installing the Maven command line is a very useful way to work with Maven and projects, especially for distributions, or when you're having trouble with m2eclipse (which happens now and then).
...
Java based framework, it manages its dependencies and components with Maven and keeps crawling state information using MongoDB. So we need to install and properly these three prerequisites:
| Children Display |
|---|
...
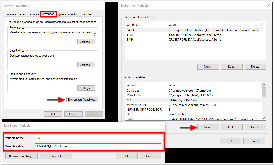
- In the System Variables section, click on "New..."
- Enter the following in the "Variable name:" field: M2_HOME
- Locate the directory within your Program files where you unpacked Maven, enter this directory name as the "Variable value:" (for example, C:\dev\apache-maven-3.3.9), then click on the OK button.
...
- In the System Variables section, again click on "New..."
- Enter the following in the "Variable name:" field: M2
- In the "Variable value:" field, enter the following, then click on the OK button: %M2_HOME%\bin
...
- Scroll through the System Variables to locate the Path variable, select it, then click on the Edit button.
- Click in the "Variable Value" field to activate it, then press your End key to move your cursor to the end of the value.
Without typing any spaces, enter the the "bin" directory from Apache Maven to your environment path (for example, ;C:\dev\apache-maven-3.3.9\bin), then click on the OK button.
...
- Open up a new DOS command-shell (go to the Start menu, enter "cmd" in the "Run" or "Search for Programs" field, and then execute the cmd.exe program).
At the prompt, enter the following, then press the Enter key: mvn -version
Success is indicated when version information is returned, as shown in the image to the right.
Code Block language text theme FadeToGrey > mvn -version Apache Maven 3.3.9 (bb52d8502b132ec0a5a3f4c09453c07478323dc5; 2015-11-10T10:41:47-06:00) Maven home: C:\dev\apache-maven-3.3.9\bin\.. Java version: 1.7.0_79 Java home: C:\dev\jdk1.7.0_79\jre Default locale: en_US, platform encoding: Cp1252 OS name: "windows 10", version: "10.0", arch: "amd64", family: "dos"
...
Step 3: Install MongoDB
...


