Page History
Step 1. Launch Aspire and Open the Content Source Management page
Before launching Aspire, you need to change the felix.properties file and add these lines:
| Code Block | ||||
|---|---|---|---|---|
| ||||
# To append packages to the default set of exported system packages, # set this value. org.osgi.framework.system.packages.extra=\ ... sun.security.krb5, \ com.sun.security.auth.callback # The following property makes specified packages from the class path # available to all bundles. You should avoid using this property. org.osgi.framework.bootdelegation=\ ... javax.security.sasl, \ sun.security.krb5 |
Launch Aspire (if it's not already running). See:
Browse to: http://localhost:50505.
For details on using the Aspire Content Source Management page, please refer to Admin UI
Step 2. Add a new content source
For this step, please follow the step from the Configuration Tutorial of the connector of you choice, please refer to Connector list
Step 3. Add a Publish to SolrCloud to the workflow
To add a Publish to SolrCloud, drag from the Publish to SolrCloud CDH (or a custom component using app-publish-to-sorlj-cdh coordinates) rule from the Workflow Library and drop to the Workflow Tree where you want to add it.
This will automatically open the Publish to SolrCloud window for the configuration of the publisher.
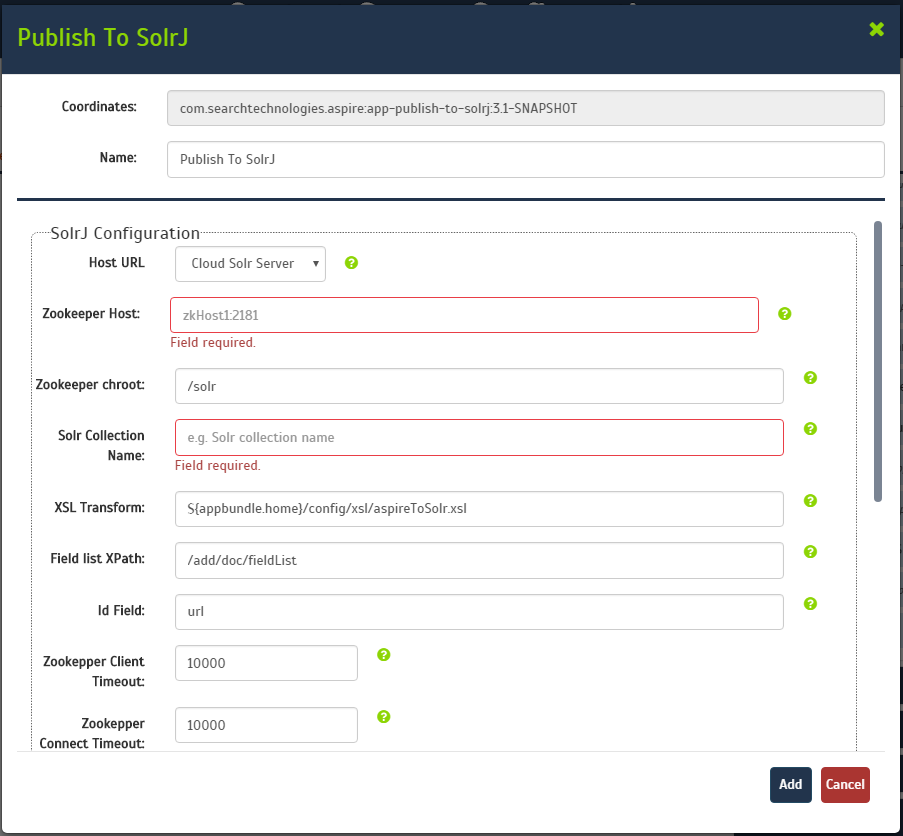
Step 3a. Specify publisher information
In the Publish to SolrCloud window, specify the following connection information to publish to SolrCloud.
Name: Enter a unique name for the publisher.
SolrJ Configuration
- Choose a Connection Method:
- CloudSolrServer: Connects using a Zookeeper url
- HttpSolrClient: Connects using a Solr url (direct connetion to Solr)
- Enter a Host URL, depending on the Connection Method
- Zookeeper Host: Zookeeper hosts and ports in a comma delimited list (ie: zkHost1:2181, zkHost2:2181, zkHost3:2181)
- Solr Host: A single Solr host and port (ie: solrHost:8993)
- Zookeeper chroot: If you're using a ZooKeeper instance that is shared by other systems, we recommend isolating the SolrCloud znode tree using ZooKeeper's chroot support.
(For example, to ensure all znodes created by SolrCloud are stored under/solr) - Solr Collection Name: Same collection of all Solr instances of the cloud
- XSL Transform: Set to the default parameter to use the default XSL transformation file. To use a custom file, follow the instructions in Edit Xsl.
- Field list XPath: XPath expression to process field list.
- Id Field: The Id used for identification the on Solr index.

Custom Application
- Zookeeper Client Timeout: Timeout for the client.
- Zookeeper Connect Timeout: Timeout for the client.
- Force Commit: If true, force a commit every time a batch is sent to the index.
- Commit with milliseconds: Milliseconds to wait before commit a batch to the index.
Kerberos Authentication
- Use Kerberos Authentication: Enable the authentication through Kerberos
- CoreSite.xml: The path for the hadoop core-site.xml file
- Login Configuration Properties: The path of the pseudo jaas properties file, please check the Login Config File.
- Max Tries: Maximum number of retry attempt to index.
- Retry Wait: Seconds to wait before re-trying to index.
- Debug: Select the check box to run the publisher in debug mode.
Click Add. It will take a moment for Aspire to download all of the necessary components (Jar files) from the Maven repository and load them into Aspire.
When that's done, the publisher will appear in the Workflow Tree.
| Info |
|---|
For details on using the Workflow section, please refer to Workflow introduction. |
Anchor LoginFile LoginFile
Step 3b. Edit the Login Config file
| LoginFile | |
| LoginFile |
The Login Config file is a pseudo JAAS (Java Authentication and Authorization Service) file. Basically, use only the properties inside the JAAS file.
For example: Normal JAAS File
| Code Block | ||||
|---|---|---|---|---|
| ||||
Client {
 com.sun.security.auth.module.Krb5LoginModule required
 useKeyTab=true
 keyTab="/home/centos/solr.keytab"
 storeKey=true
 doNotPrompt=true
 useTicketCache=false
 principal="solr/[email protected]";
}; |
The Login Config file for the publisher should be something like this, with only the properties propertyName=propertyValue (module name and login type are not necessary).
| Code Block | ||||
|---|---|---|---|---|
| ||||
useKeyTab=true keyTab="/home/centos/solr.keytab" storeKey=true doNotPrompt=true useTicketCache=false principal="solr/[email protected]" |
Overview
Content Tools