Page History
Step 3. Add a
Azure OpenAI Chat CompletionsAspire Text Splitter application to the Workflow
To add a Azure OpenAI Chat Completions Aspire Text Splitter application, drag it from the Applicationssection to the desired Workflow event. This will automatically open the Azure OpenAI Chat Completions Aspire Text Splitter configuration for the application.


Step 3a. Specify
Prompt Typethe Field or Fields to Split
In the "General" configuration section, specify the type of prompt to use. Currently, "User", "System" and "Assistant" types are supported.
Field or Fields that need to be split. If multiple fields are being split, separate the names with commas.

Step 3b. Specify
Prompt Texta Result Field
In the "General" configuration section, specify the text for your prompt. It can be plain text or a groovy script that must have text as its final output.
Step 3c. Add more prompts (optional)
Optionally, in the "General" section, you can add as many prompts as desired. You must then again, specify a prompt type and a prompt text for each of them.
field that will be created to hold the result of the field(s) splitting.

Step 3c. Specify The Split Type
In the "Endpoint Configuration" section, specify type of split to be performed:
- Document: the field(s) will be treated as a whole document and hence, won't be split.
- Paragraph: the field(s) will be split by paragraphs.
- Sentence: the field(s) will be split by sentences.
- Custom: when using the "Custom" option, you will be asked to specify a custom regex to split the field(s) contents.
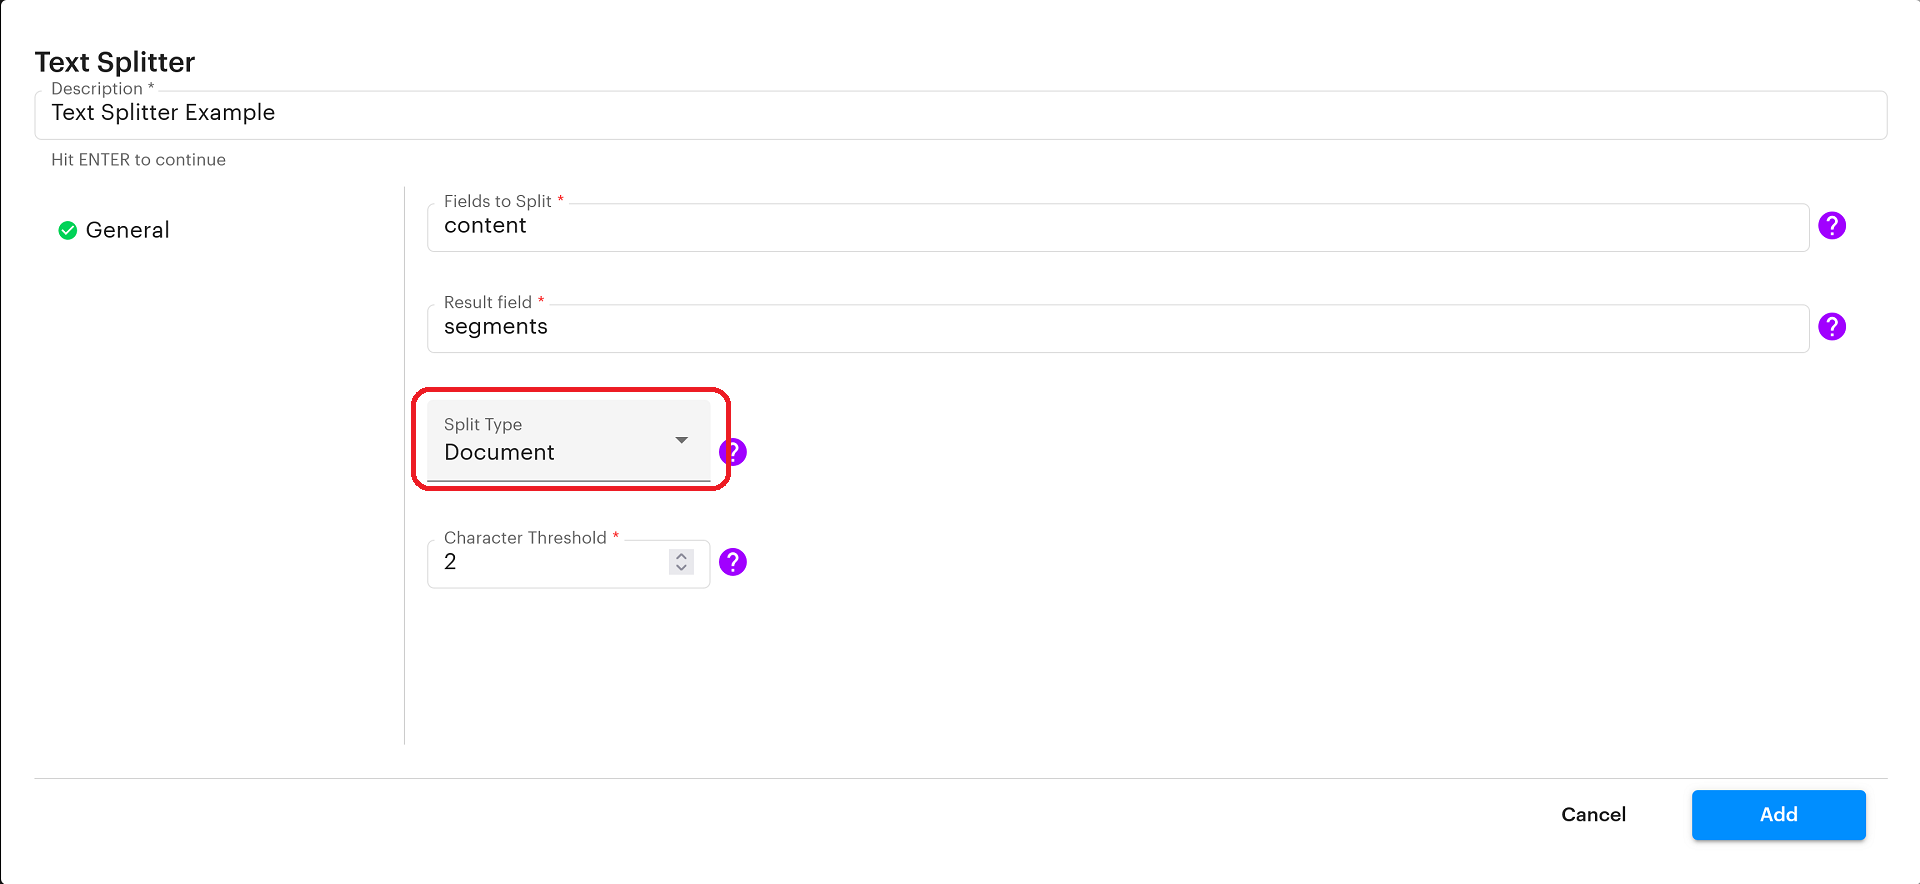
Step 3e. Specify a Character Threshold
In the "General" configuration section, specify the character threshold: if each split section's character length for the split field(s) is less than the specified threshold, it will not be taken into consideration in the output
Step 3d. Configure the Endpoint
In the "Endpoint Configuration" section, specify the API version and Model to be used.
Step 3e. Configure Model Parameters
In the "Model Parameters" section, specify parameters to be used with the Model specified in the previous step.
After this, you can press the add button to finish the workflow.
Now the workflow component is ready to be used in your Aspire Seeds.

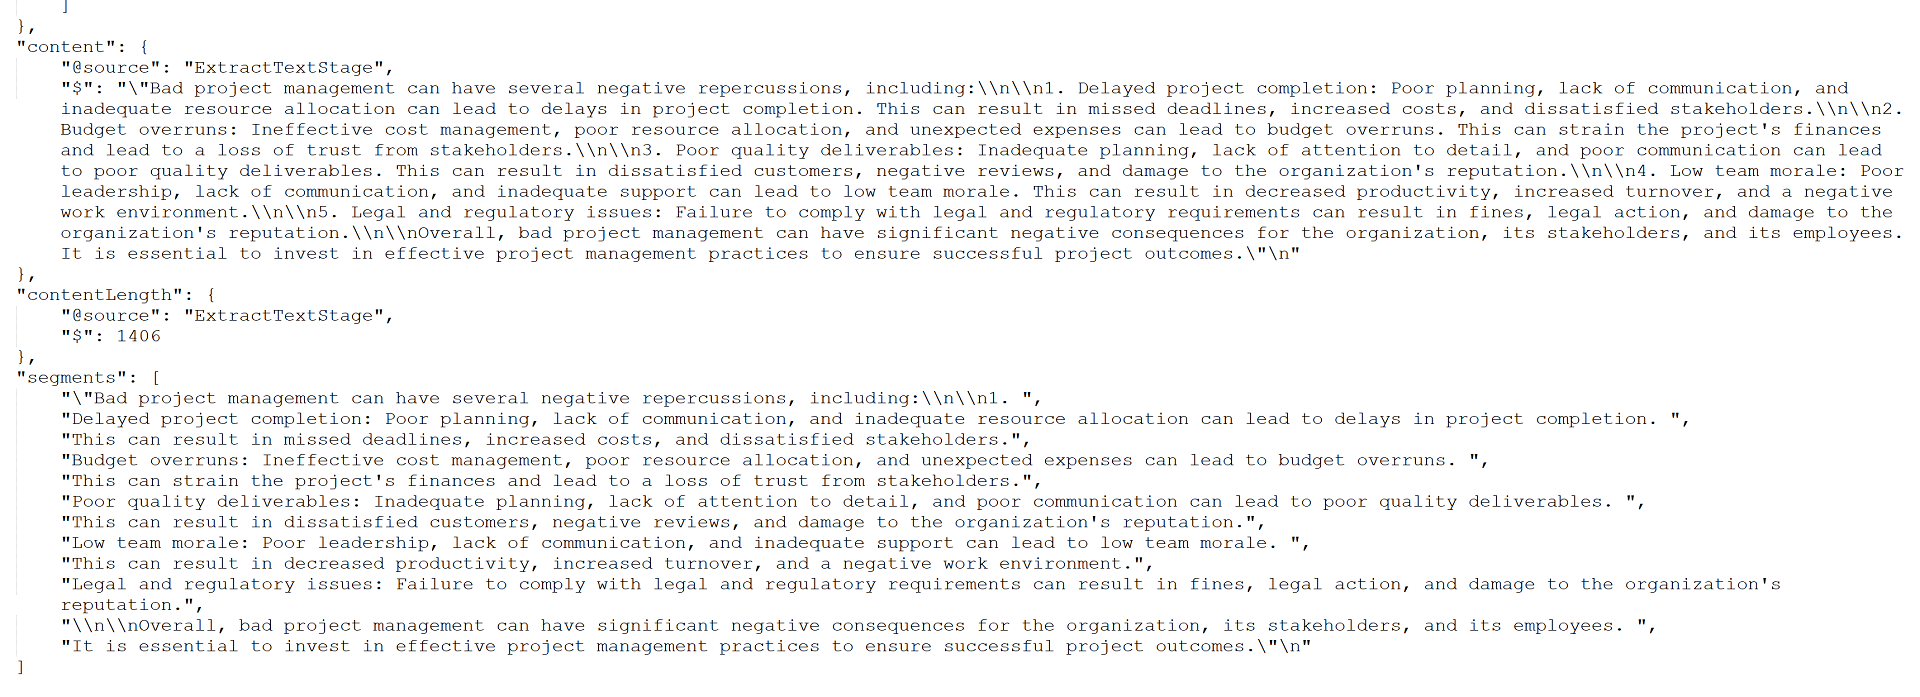
Output example
Here is an example are a couple examples of the output. The application will add a "chatCompletionsResponse" object to the document which in turn will have the response content in a was set up to split the "content" field , a "responseProperties" field with response properties, including usage statistics, a "requestProperties" field, with the corresponding request properites and finally, a "modelProperties" field with the properties with which the model was configured.by sentences and save the result in the "segments" field. The first example was done with a threshold of 2 characters and the second with a threshold of 10.
Threshold of 2:

Threshold of 10:
| Info |
|---|
For details on using the Workflow section, please refer to Workflow introduction. |
Overview
Content Tools