Step 1: Create the new application
- Go to your Active Directory in Windows Azure.
- Select Applications.

- Click ADD.

- Select Add an application my organization is developing.

- Set "Aspire AAD Group Expander" as the application name and "Web application and/or web api" as application type.
- Click the arrow.

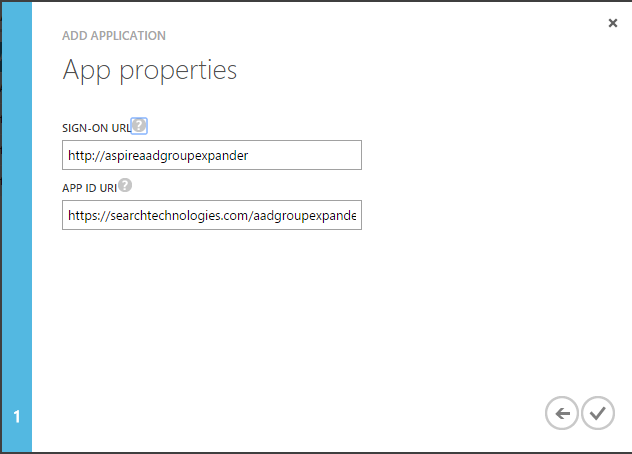
- Set the Sign-On URL as "http://aspireaadgroupexpander" and the App ID URI "https://searchtechnologies.com/aadgroupexpander".
- Select the check box.
Step 2: Get the Client ID and Secret Key
- Go to Configure.

- Scroll down until you find the Client ID and the "Keys" Section.
- First copy and save the Client ID.
- Then select the duration for the new key.

- Click Save.

- You'll now see the Client Key and it's expiration date.
- Copy this key and save it. It'll not appear again after you leave the page

Step 3: Application Permissions
- Scroll down to Permissions to other applications.
- Leave the Read directory data permission under Application Permissions.
- Remove any other permissions for the application.
- Click Save.
Overview
Content Tools