On this page:
Step 2. Add a new Content Source
For this step, please follow the step from the Configuration Tutorial of the connector of you choice, please refer to Connector list.
Step 3. Add a new Publish to HBase to the Workflow
To add a Publish to HBase, drag from the Publish to HBase rule from the Workflow Library and drop to the Workflow Tree where you want to add it.
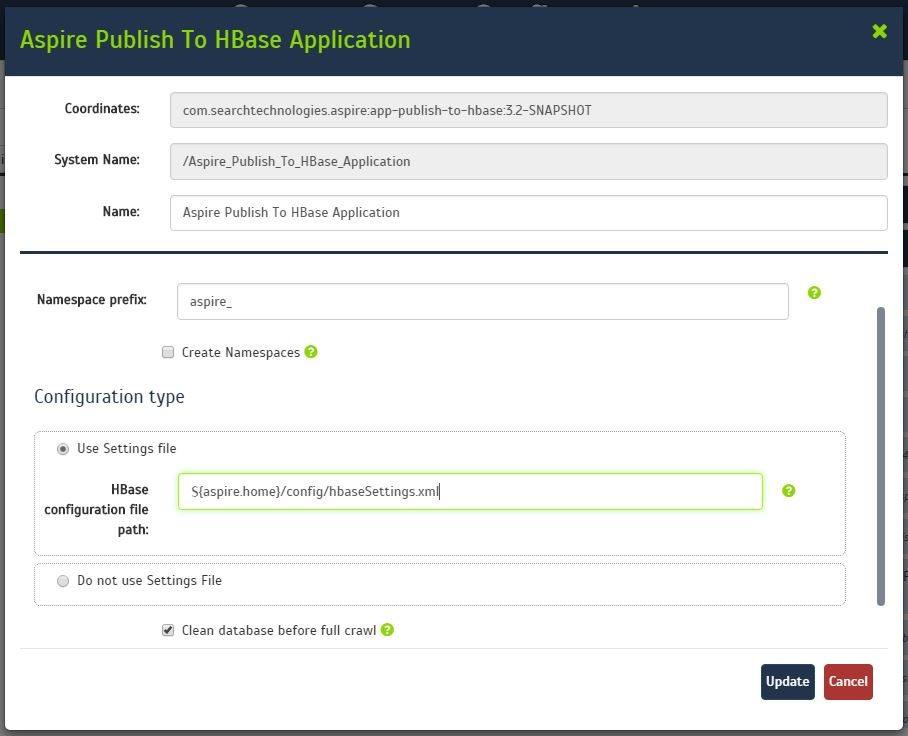
This will automatically open the Publish to HBase window for the configuration of the publisher.
Step 3a. Specify Publisher Information
In the Publish to HBase window, specify the connection information to publish to the .
- Name: Enter the source name to use for publishing the document.
- Namespace prefix: Enter the prefix of the name space.
- Create Namespaces: Select the check box if the publisher should attempt to create the namespaces.
Configuration type
- Use Settings file:
- HBase configuration file path: Enter the path that contains the HBase configuration file.
- Do not use Settings File
- Username: Kerberos User with the permissions to publish to HBase.
- Keytab: Path to the Keytab file to use.
- Add resources: Select the check box to pass Hadoop resources files (hbase-site.xml) to the publisher.
- Resource file: Hadoop resource file path
- Add properties: Check if you are going to pass specific Hadoop properties to the publisher.
- Name: Hadoop property name
- Value: Hadoop property value
- Clean database before full crawl
- Debug: Select the check box to enable debugging messages.
Step 3b. HBase settings file
If used, the HBase settings file has the following structure:
<settings>
    <properties>
        <property name="hbase.zookeeper.quorum">10.0.0.114</property>
    </properties>
    <configDir>config\kerberos\conf</configDir>
    <security>
        <kerberos >
            <user>hbase/[email protected]</user>
            <path>config\kerberos\hbase.keytab</path>
        </kerberos>
    </security>
</settings>
- Properties: Put any Hadoop property required
- Config Dir: Path where the Hadoop Resources files are located
- Username: Kerberos user with the permissions to publish to HBase
- Keytab: Path to the Keytab file to use

Once you've clicked on the Add button, it will take a moment for Aspire to download all of the necessary components (the Jar files) from the Maven repository and load them into Aspire. Once that's done, the publisher will appear in the Workflow Tree.
For details on using the Workflow section, please refer to Workflow introduction.
Overview
Content Tools