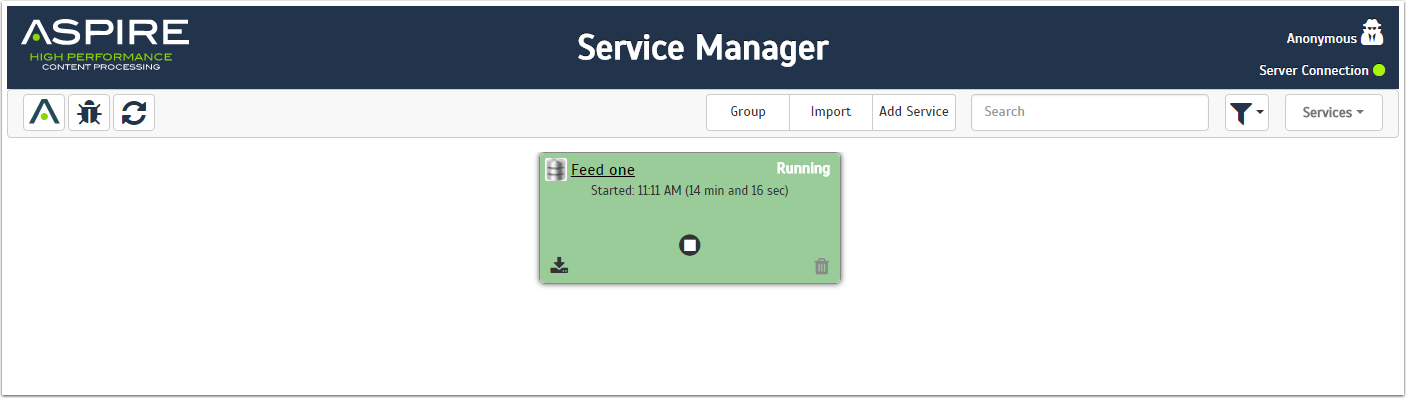
Service Manager
This page displays the service "cards" that show current status, start time, and running time.
- You can create, sort, search, filter, group, view, and control services.
- You can even change each service card's position to one more suitable by dragging the service and dropping it over the service you want to swap places with.
Top Bar Manager
Most of the functionality for the Manager section can be found in the top bar

Functionalities
- Aspire Logo
- Normally a link to the Home page, depending of the section. For Manager, it does nothing.
- Current User
- Indicates the current user logged in.
- Server Connection
- Indicates the speed of the connection between the browser and the server
- GREEN: Less or equal to two seconds (>= 2s)
- YELLOW: From two to 4 seconds (< 2s and >= 4s)
- ORANGE: Higher than 4 seconds (< 5s)
- RED: No response from the server
- Indicates the speed of the connection between the browser and the server
- Aspire Wiki
- Opens a new tab to the wiki.
- Debug Console
- Access Aspire Debug in a new tab
- Refresh
- Reloads just the services, without reloading the whole page.
- Group
- Enables the grouping option for all the services.
- Import
- Imports a .zip file with the configuration for a service.
- Add Service
- Opens the menu with all of the available services.
- Search
- Filters the services based on the search string (can be a plain text or a regex expression).
- Filter
- Opens the menu to all the filters available.
- Directory
- Access other sections of Aspire (Content Source, OS License, Developer tools, Servers, and About.)
Service Configuration
Admin UI provides a wizard style configuration process to create a complete service, divided in three main sections (General, Connector and Workflow).
General
Service
Workflow
Top Bar Configuration
On the top bar, we will find the general functionality as well as helpful information from the service

Functionalities
- Aspire Logo
- A link to the Home page (Service Manager).
- Current service
- Displays the icon of the connector type and the name of the service.
- Current User
- Indicates the current user logged in.
- Server Connection
- Indicates the speed of the connection between the browser and the server
- GREEN: Less or equal to two seconds (>= 2s)
- YELLOW: From two to 4 seconds (< 2s and >= 4s)
- ORANGE: Higher than 4 seconds (< 5s)
- RED: No response from the server
- Indicates the speed of the connection between the browser and the server
- Home
- A link to the Home page (Service Manager).
- Aspire Wiki
- Opens a new tab to the wiki.
- Debug Console
- Access Aspire Debug in a new tab.
- Return
- Checks the configuration for changes. If none, returns to the Home page. Otherwise, asks if you want to discard changes.
- Done
- Checks the configuration for changes. If none, returns to the Home page. Otherwise, asks if you want to discard changes.
- Save
- Saves or Updates the service.
- Directory
- Access other sections of Aspire (Content Source, OS License, Developer tools, Servers, and About.)
- Saving the service will not redirect to the Home page.
- Clicking Save will not save the Workflow. The workflow saves automatically with each change.
General Configuration
The General Configuration contains the basic information for the service. Every service will have the same General Configuration layout.
- Step Indicators
- Each step of the configuration will be displayed. You can click and move to any step directly.
- Name
- This is the display name of the service.
- System Name
- This is the name of the service for the server, created from the display name provided. Only available after the service is saved.
- Next Step
- Clicking area; to move to the next step.
The System Name can not be changed. It will be available after the service is saved.
Service Configuration
The Connector Configuration contains the specific information for the service. The Connector Configuration layout will change depending of the connector used.

- Step Indicators
- Each step of the configuration will be display. You can click and move to any step directly.
- Next & Previous Step
- Clicking areas; to move to the next or the previous step.
- The grayed-out area "Service Configuration" will load the connector-specific configuration.
Workflow Configuration
The workflow configuration is where the customization of the data is done. You can edit, delete, add, and publish information using our apps, scripts or even add your own custom apps.
- A service may not have a workflow at all.
- Pull-down Menu
- Services may have different steps. Those steps are displayed in a pull-down. The number of steps may also be different between different services.
- Previous Step
- Clicking areas; to move to the previous step.
For more information about the Workflow, see the Workflow page.
Overview
Content Tools