![]()
Step 1. Launch Aspire
Launch Aspire (if it's not already running). See: Launch Control
Step 2. Open the Content Source Management Page
Browse to: http://localhost:50505.
For details on using the Aspire Content Source Management page, please refer to Admin UI.
Step 3. Add a New Content Source
For this step, please follow the procedure from the Configuration Tutorial of the connector of you choice. Refer to the Connector list
Step 4. Add a New Publish to S3 to the Workflow
To add a Publish to S3 drag from the Publish to S3 rule from the Workflow Library and drop to the Workflow Tree where you want to add it.
This will automatically open the Publish to S3 window for the configuration of the publisher.
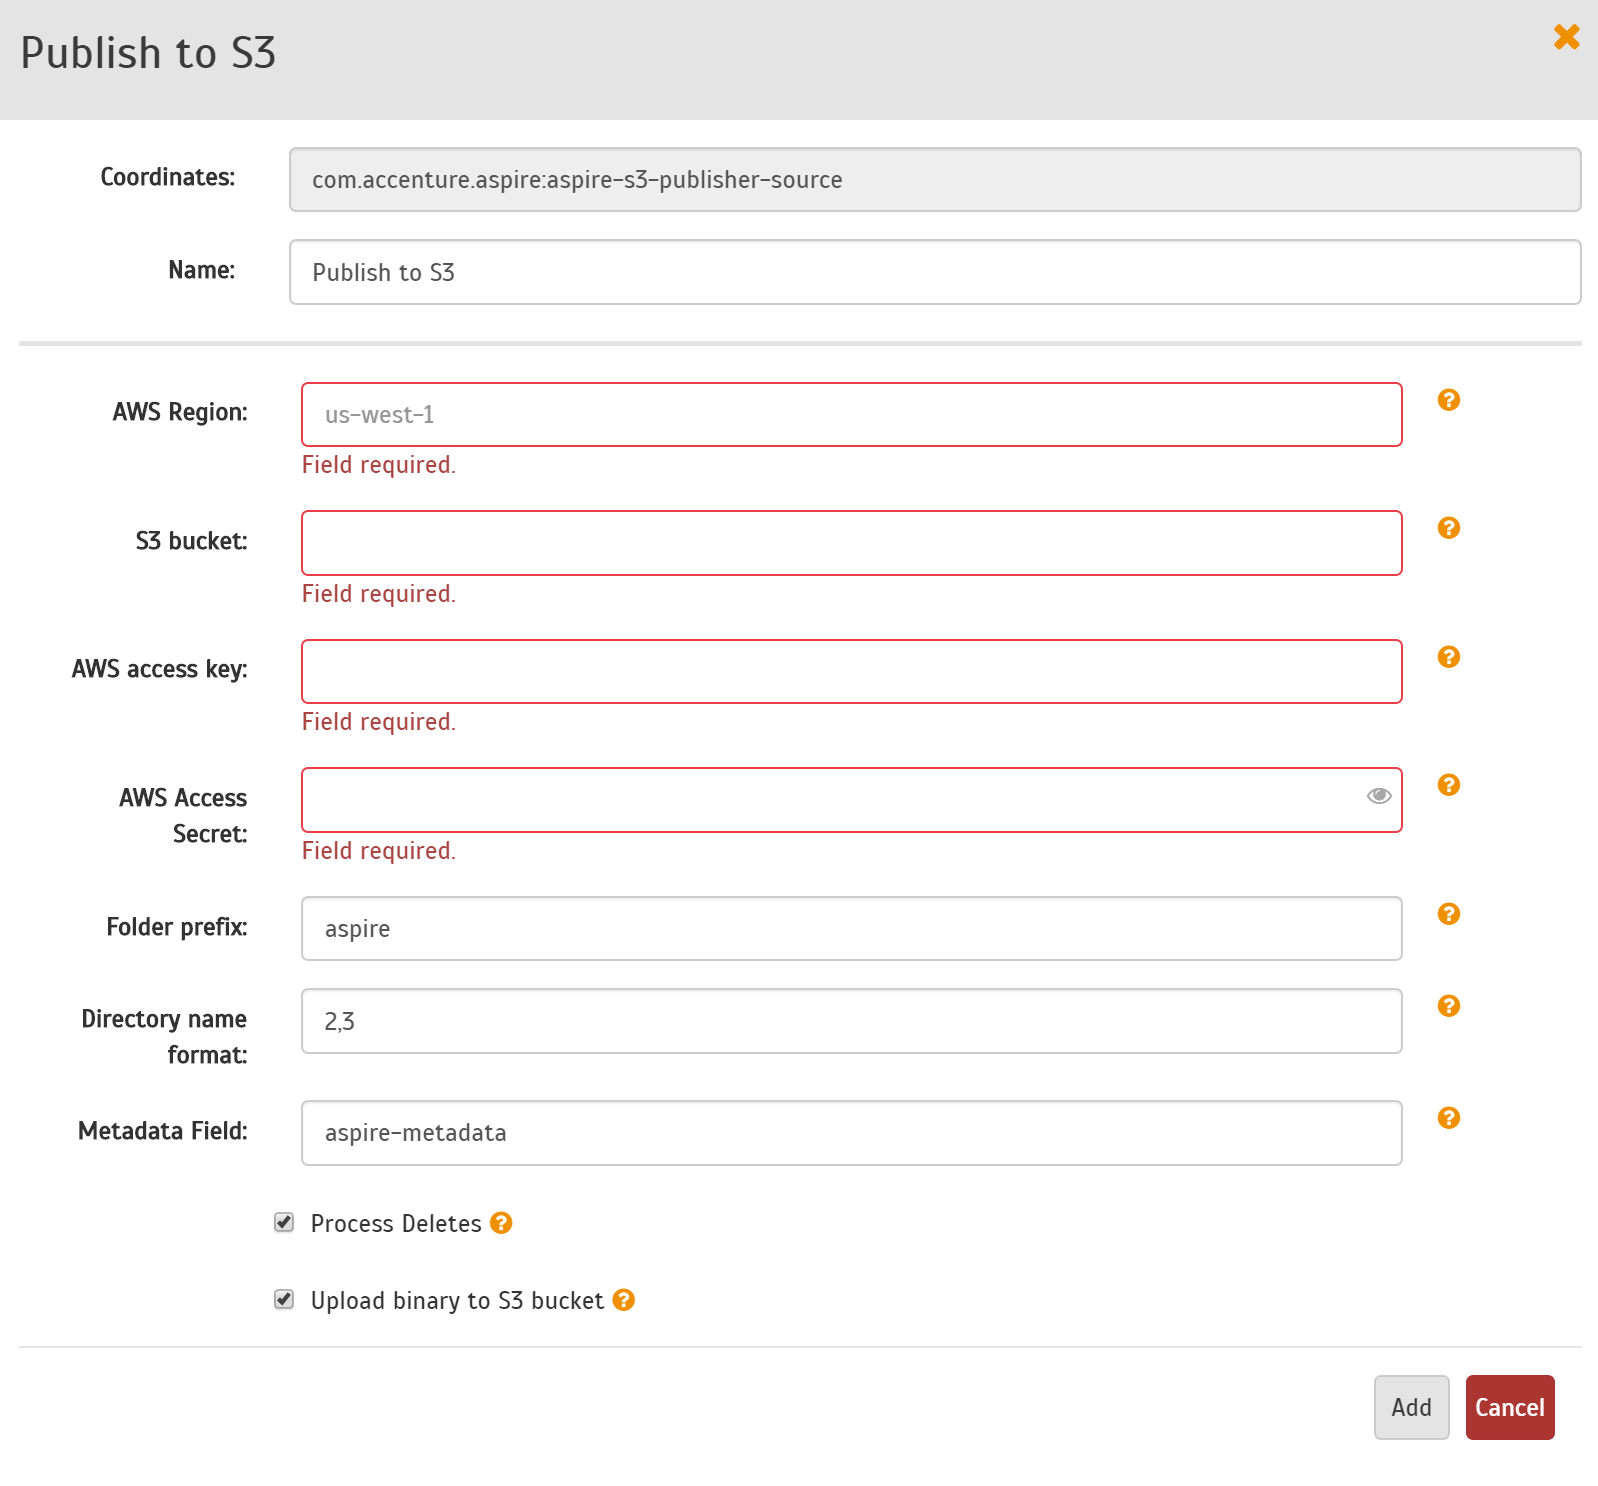
Step 4a. Specify Publisher Information
In the Publish to Azure Blobs window, specify the connection information needed to publish to Azure Blob storage.
- AWS Region: This is the AWS Region to connect.
S3 Bucket: Enter the name of the bucket on which the documents will be stored.
AWS Access Key: The Acces Key to authenticate against the S3 instance.
- AWS Access Secret: The AWS key secret to authenticate agains the S3 instance.
- Folder prefix: Custom prefix that will be used to create an "folder hierarchy". Aspire will publish the files with the following name: "folderPrefix/jobId/fileName".
- Directory name format: The number of characters from the hash of the identifier to use for each directory in the store structure. The default value of "2,3" will give 2 levels of diretory, using the 5 lowest significant characters from the hash, the top level using the highest 2 significant characters of those 5 characters and the second level using the other 3.
- Metadata Field: Field, as part of the user metadata, that will be used to store the metadata generated by Aspire for this S3 object. The metadata will be stored in JSON format. The final name will be "x-amz-meta-<Metadata Field>".
- Process Deletes: If enabled, all files removed from the content source will also be removed from the S3 instance. If disabled, the objects will not be removed from the S3 instance, even when they are deleted from the content source.
- Upload binary to S3 bucket: If checked, the actual file will be uploaded to the S3 bucket. If not selected, then only a metadata file (with a .meta suffix) will be uploaded instead, containting only the metadata and not the binary.
- Click Add.
Once you've clicked Add, it will take a moment for Aspire to download all of the necessary components (the Jar files) from the Maven repository and load them into Aspire. Once that's done, the publisher will appear in the Workflow Tree.
For details on using the Workflow section, please refer to Workflow introduction.
Overview
Content Tools