Page History
Create Connection
- On the Aspire Admin UI go to the connections tab

- All existing connection will be list. Click on the new button

- Enter the new connection description.
- Select Filesystem SMB from the Type list.
- General
- Base Path: Path of the base directory to crawl. All the seeds will be prefixed with this value to form the full path. All the seeds will be prefixed with this value to form the full path
- Hostname: Hostname where the shared directory is located.
- Port: Port where the SMB protocol is usedIgnore Symbolic Links: If enabled symbolic links will not be processed and links in the root items will cause an error.
- Index directories: Enable to index the directories.
- Scan recursively: Enable to scan discovered directories recursively.
- Stop on scan error: If checked, the crawl will stop if error.
- Disable fetcher: Check to disable the connector fetcher, only metadata will be collected.
- Show SMBJ logs: Enable SMBJ logging, (WARNING) enabling decrease performance.
- Scope
- Scan excluded items: Enable to force the scan of excluded directories, so child items within the scope can be found.
- Include patterns: Patterns to match against document URL, if any of them match, the document will be included in the crawl.
- Exclude patterns: Patterns to match against document URL, if any of them match, the document will be excluded from the crawl.
- Security
- Static ACLs: These ACLs will be added to all of the documents.
- Name: Name of the ACL.
- Domain: Domain to which the ACL belongs to.
- Entity: Whether or not Whether this ACL is for a group or a user.
- Access: Whether or not Whether this ACL will have access to crawled files.
- Connection
- : Check to resolve (DFS) paths.
- Connection timeout: Timeout in milliseconds for each SMB request.
- Maximum retries: Maximum retries permitted per document.
- Base back off: Base time for the back off sleeps (in ms).
- Back off multiplier: Multiplier factor to be used for the back off time.
- Credentials
- Select credential for this connection.
- Policies
- Throttle Policy: Select Select the throttle policy that applies to this connection object.
- Routing Policies: Select the routing policies that this connection will use.


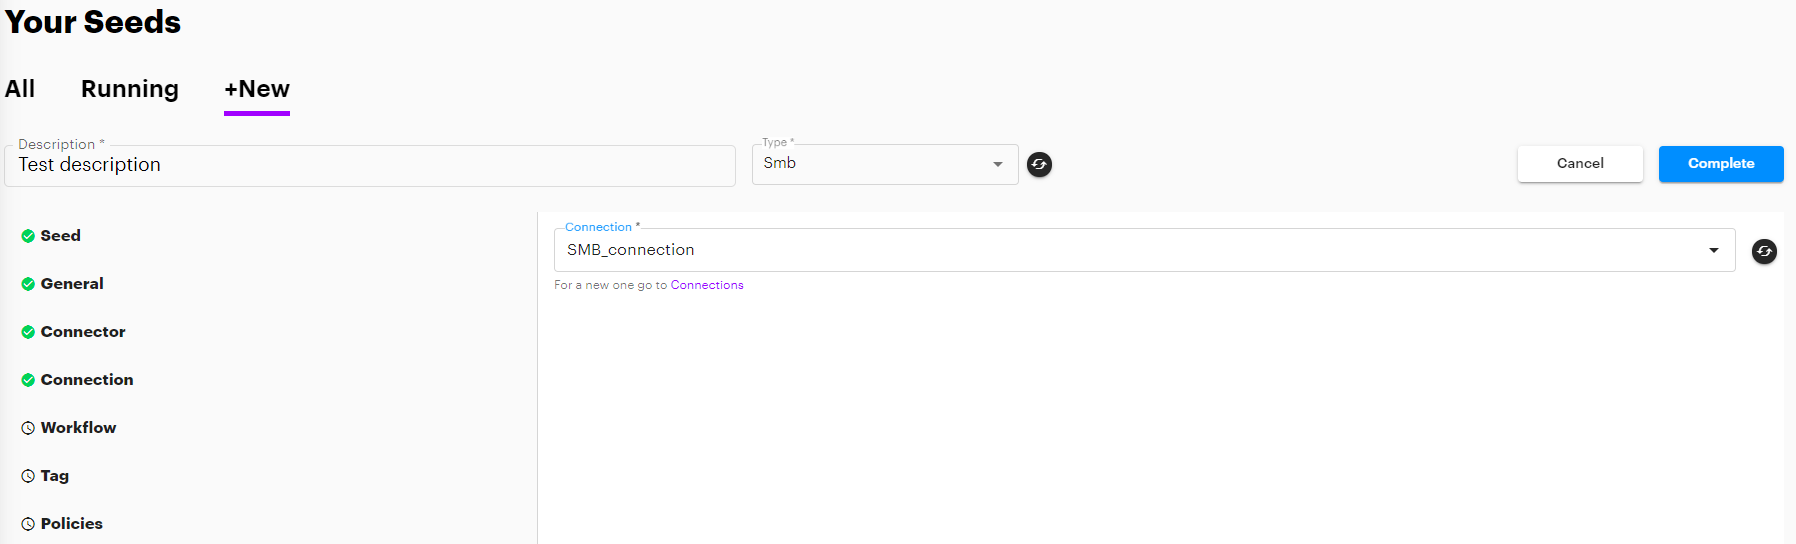
Create Seed
- On the Aspire Admin UI go to the connections tab

- All existing connection will be list. Click on the new button
- Enter the new seed description.
- Select Filesystem SMB from the Type list.
- Seed: The subdirectory to crawlCrawl path. This value will be appended to the base path of the connection.
- General: Process start path as a file: If checked, the path will be processed as a file instead of a directory. (WARNING: The crawler will only process the seed and then will stop.)
- Connector: The id The ID of the connector to be used with this seed. The connector type must match the seed type.
- Connection: The id The ID of the connection to be used with this seed. The connection type must match the seed type.
- Workflow: The ids The IDs of the workflows that will be executed for the documents crawled.
- Tag: The tags of the seed, these can be used to filter the seed.
- Policies
- Throttle Policy: Select the throttle policy that applies to this connection object.
- Routing Policies: Select the routing policies that this connection will use.


Create Credential
- On the Aspire Admin UI go to the credentials tab

- All existing credentials will be list. Click on the new button
- Enter the new credential description.
- General
- Domain: Domain of the account that will crawl shared directory. Leave blank for local user.
- Username: Account User
- Password: Account Password


Overview
Content Tools