Step 2. Download, Distribute and Activate the Parcel
- Go to the Cloudera Manager Parcels management page and look for the Aspire parcel that should be available to download.
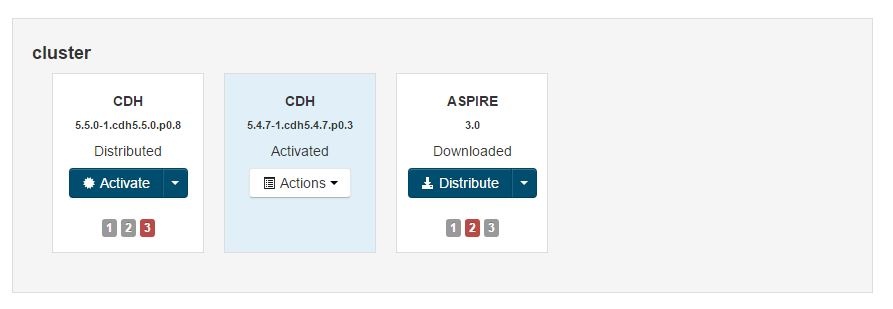
- Click Download and wait until download process is done.
- Click Distribute.
- After the distribution is done, click Activate.
- The parcel should be activated on all instances of the Cloudera Cluster.
- The parcel should be activated on all instances of the Cloudera Cluster.


Step 3. Add the New Service
On the cluster, click Add Service to go to the add service wizard.
Step 3a. Add Aspire as a service
In the wizard, Aspire should be listed as a service to install.
- Select Aspire from the available services.
- If not selected automatically, select the Zookeeper service to use.
- Select the hosts where Aspire Server will be installed.


Step 3b. Configure Aspire
- Common settings
- Aspire Version: The Aspire version
- Maven username: Enter the username of the maven account
- Maven password: Enter the password of the maven account
- No SQL settings
- DB provider implementation: Select the implementation of the no SQL db provider to use.
- DB provider implementation: Select the implementation of the no SQL db provider to use.
- HBase settings, these will be ignored if the provider is not HBase
- HBase Properties: Specify the required Hbase properties to use in the format: NAME:VALUE.
- HBase config path: The path to the HBase config files.
- HBase Kerberos User: The HBase user to use with Kerberos.
- HBase Kerberos Keytab: The HBase keytab to use with Kerberos
- Mongo settings, these will be ignored if the provider is not Mongo
- Mongo DB server: The Mongo DB server to use.
- Mongo DB server: The Mongo DB server to use.
- Authentication settings
- Authentication type: The type of authentication user by the Aspire Admin UI.
- Authentication type: The type of authentication user by the Aspire Admin UI.
- Ldap settings, these will be ignored if the authentication type is set to None
- LDAP server: The ldap server to validate against.
- LDAP Authentication: The ldap authentication to use (anonymous/simple/DIGEST-MD5).
- LDAP Search Base: The search base for ldap queries for the user's dn.
- LDAP Admin Group DN: If empty, disables group based access control. Otherwise, holds the dn of the group that may access the administration pages.
- LDAP Groups Hold Members: Indicates that ldap group objects hold the membership information. By default, user objects are expected to hold group membership.
- LDAP User DN Query: The ldap query used to find the dn for the user that logged in.
- LDAP Member Attribute: The attribute of the ldap object (be it user or group) that holds information about group membership.
- Other Aspire settings
- System Properties: Specify the required Aspire system properties to use in the format: NAME:VALUE. This properties will be avaible to use on the installed Aspire Components.
- Bundle Versions: Specify the required bundle versions to use in the following format: ARTIFACT_ID:VERSION.
- Felix settings
- Additional Felix Properties: Add any additional Felix properties to use, format: PROPERTY=VALUE.
- Extra System Packages: Appends packages to the default set of exported system packages.
- Boot Delegation Packages: The following property makes specified packages from the class path available to all bundles. You should avoid using this property.
- JVM settings
- Initial Memory: Aspire initial memory.
- Maximum Memory: Aspire maximum memory
- Maximum Metaspace: Aspire maximum Metaspace
- JVM Additional Options: Add any additional JVM options to use, format: OPTION=VALUE.


Overview
Content Tools