Before starting to migrate your Aspire deployments to Aspire 5.0, it is strongly advised to understand the architectural change: Aspire 5.0 Architecture
Migrating to Aspire 5.0 is a process that not only changes how the configuration for the crawls are done, but also changes to the hardware architecture must be considered.
The current guide describes the typical journey a migration from Aspire 3/4 would look like.
Step 1. Resource allocation considerations
Aspire 3 and 4 had a horizontal distributed architecture, where all the Aspire nodes executed the exact same software and configuration. All nodes were equal, which meant more complex synchronization, and hard to balance throughput and resource utilization.
Aspire 5.0 consists of two distinct types of nodes: Manager and Workers. More Manager nodes means more simultaneous crawls. The more worker nodes higher the throughput, but you can have an heterogeneous set of worker nodes, where some would run certain crawls, and the others would run other types of crawls.
For production deployments, where high availability is required, it is recommended to have at least 2 manager nodes, as if one fails, the other one can assume the work from the failed one, while the failed one recovers and re-claims work.
Resource requirements:
| Node | Minimum nodes | Recommended nodes | Minimum | Recommended |
|---|---|---|---|---|
| Manager | 1 | 2 | 4 GB RAM 2 CPU cores | 4 GB RAM 4 CPU cores |
| Worker | 1 | 2 | 8 GB RAM 4 CPU cores | 16 GB RAM 4 CPU cores |
Java version
Aspire 5 was developed and tested using OpenJDK 11
Step 2. Deploy your Aspire 5 cluster
There are several options on deploying Aspire 5, from on-premise installations both Windows or Linux based, up to container based deployments using Kubernetes. Choose your preferred deployment option and follow the instructions at How to Install Aspire.
Step 3. Choose a content source to migrate
Choose a content source on Aspire 3/4 you want to migrate to Aspire 5. Verify the availability of the connector in Aspire 5 at Connectors.
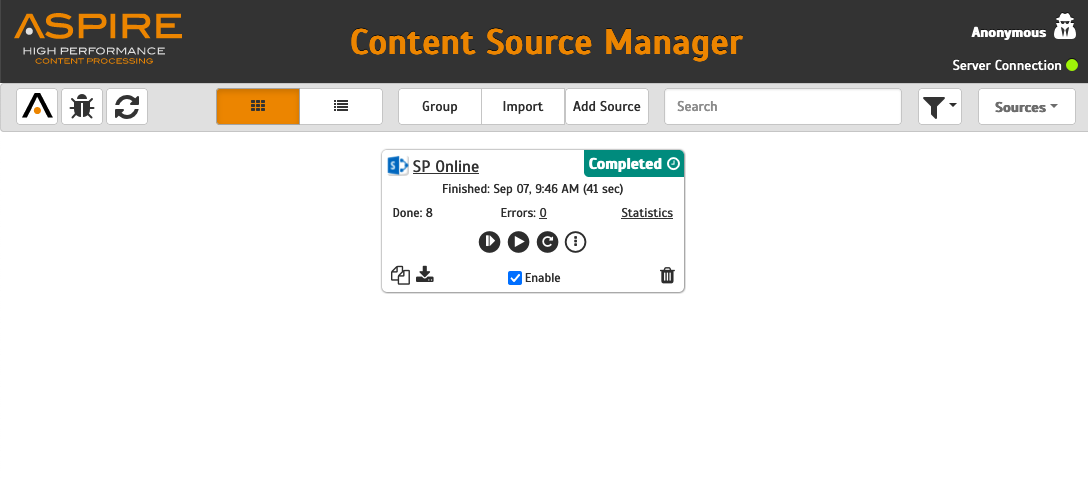
We'll use a SharePoint Online content source in Aspire 4 as an example
- Create a Connector Instance in Aspire 5 for the connector you'll use. Note that this connector instance can be shared across multiple crawl configurations, so you may only create one connector instance per content source connector type in Aspire 4.
- Open Aspire 5 Admin UI and click on the "Connector Instances" Section on the left side menu
- On the Connector Instances Section, click on "New"
- Enter the name for your new Connector instance, and select its Type (in this case SharePoint online)
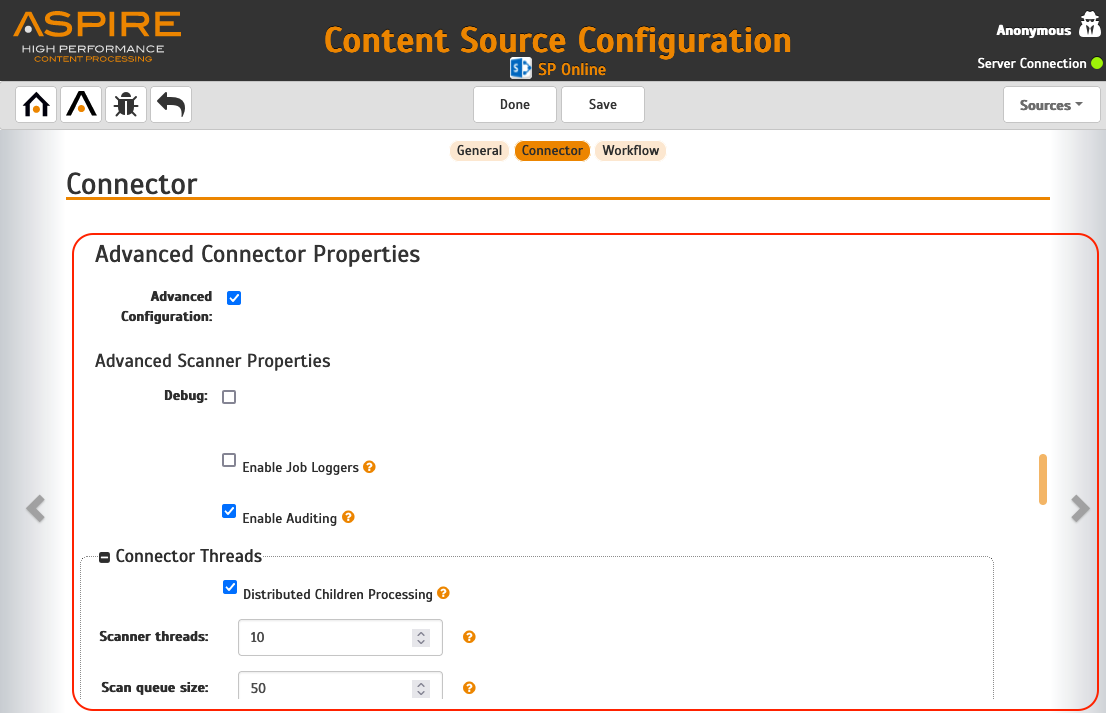
- Configure the properties you need for this connector instance, all the properties you can select here can be found in Aspire 3/4 at the "Connector" section of the content-source configuration, at the "Advanced Connector Properties" sub-section.
- Click on "Complete" on the Aspire 5, connector instance creation, once all the properties have been set-up.
- Open Aspire 5 Admin UI and click on the "Connector Instances" Section on the left side menu
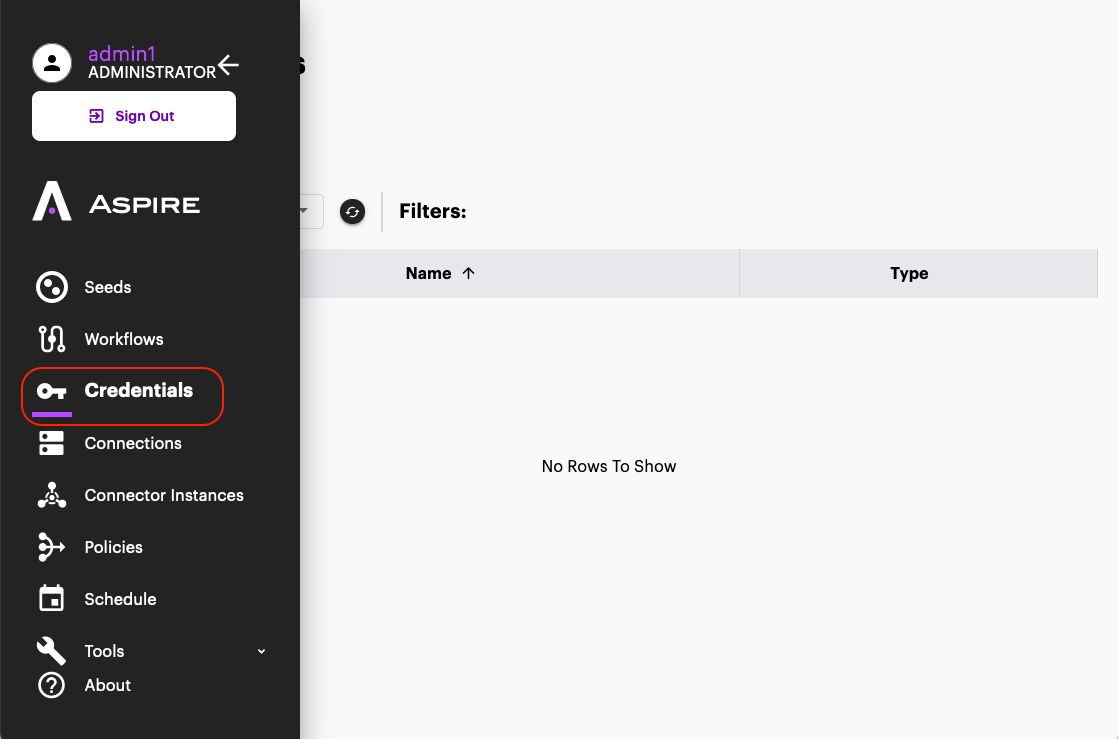
Once a connector instance is created, now create a Credential configuration object. We'll use this to create our connection at step 3.- Open the "Credentials" section on the left side menu
- On the Credentials section, Click on "New"
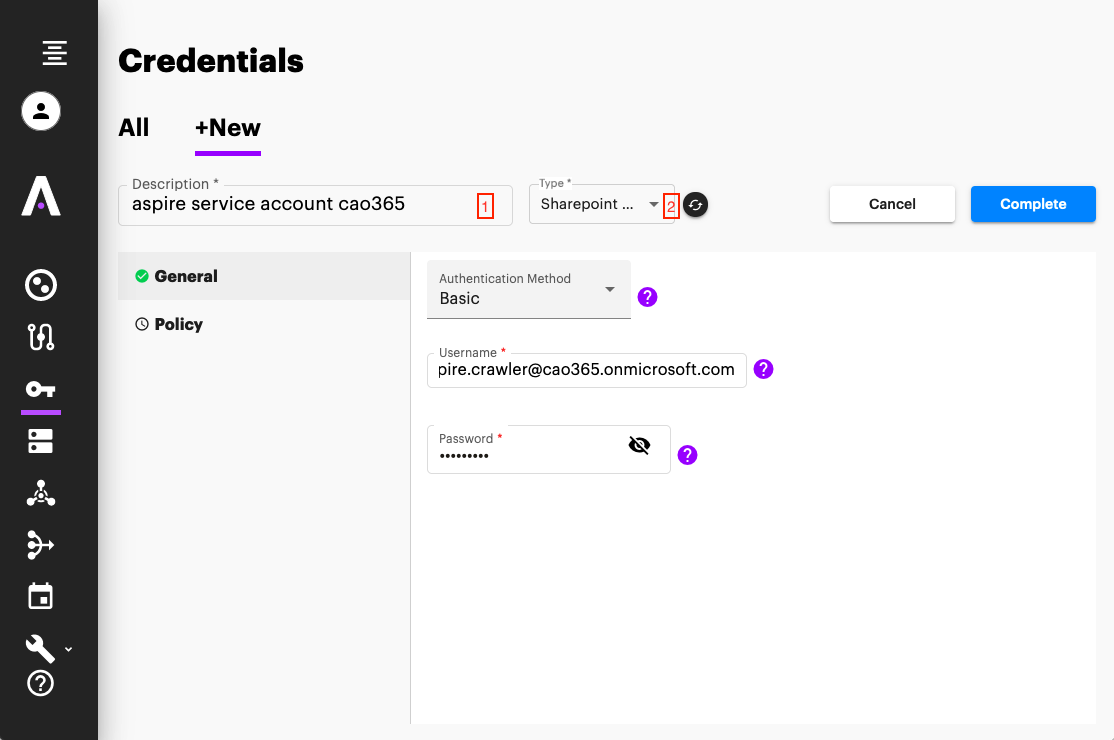
- Enter a name for your Credentials object and the type of source (in this case SharePoint online)
- Choose and fill the right credentials properties, this can typically be found on the "Connector" section on the Aspire 3/4 content source
- Once all the properties have been set, Click on "Complete" to create the Credentials object
- Open the "Credentials" section on the left side menu
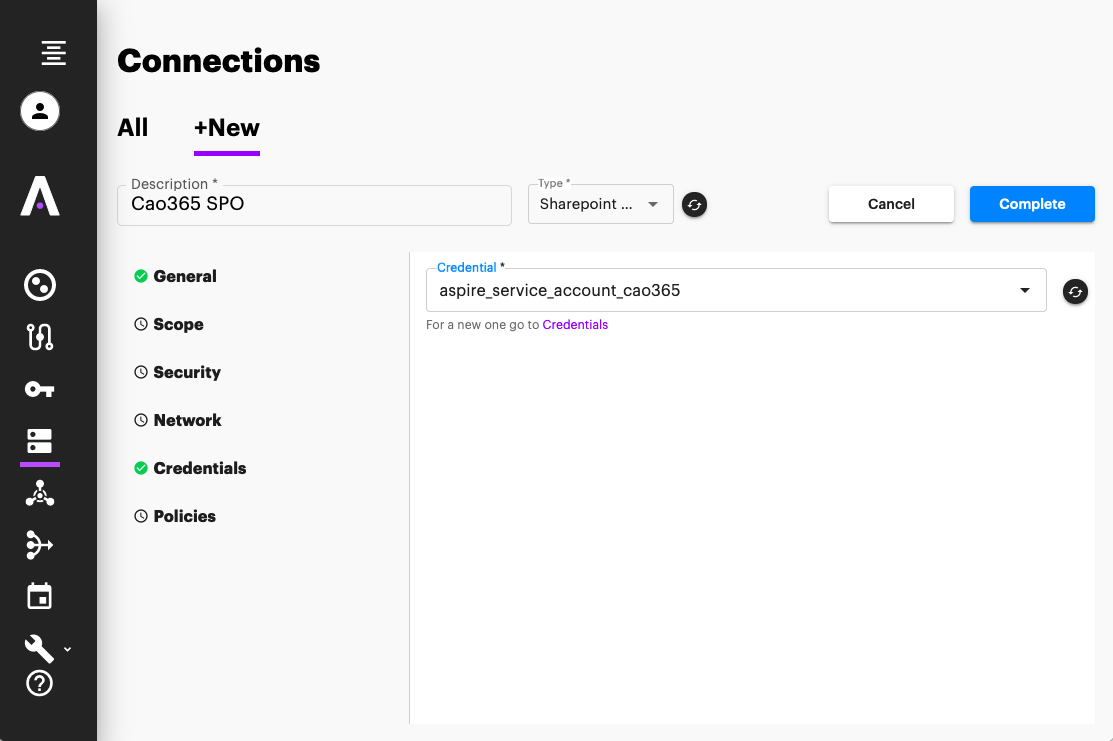
Once the Credentials object is created, now create a "Connection" configuration object. This will point to your SharePoint online instance, without indicating the site collections to crawl (each site collection or list would be a different configuration object).- Open the "Connection" section on the left side menu
- On the Connections section, Click on "New"
- Enter a name for your Connection object, and its type (in this case SharePoint Online)
- Enter the properties required for your connection object, these properties can be found in Aspire 3/4 at the "Connector" section of the content-source. Notice that the Server URL is NOT the crawl path, but rather, a base URL to use for the crawls. All paths configured in section 4 seeds, will be relative to this Server URL. What's considered a Base URL changes from connector to connector. Please check each connector documentation for more details.
- Select the credential you created in step 2
- Once everything is configured, Click on "Complete" to create the Connection object
- Open the "Connection" section on the left side menu
Once the Connection object is created, now the Seed objects can be created. Seeds are the starting points for the crawls, they represent specific locations to start the crawls from. They are configured relative to "Connection" and Connector Instance objects.


Aspire 5 splits the configuration of crawls into several interconnected configuration objects, which combined can run a crawl, we need to take our "content-source" configuration and split it into the required Aspire 5 configuration objects.
Each connector determines what goes where, but roughly speaking this is how they should now be configured:
- connector instance
- General behavior of connector application inside the worker. Mostly all properties under "Advanced Configuration" in Aspire 4.0 are present here. Connectors API
- A single connector instance can be reused for many different connections.
- credential
- All access related properties, account names, passwords, authentication type, etc. Credentials API
- A single credential instance can be reused for many different connections.
- connection
- Everything that has to do with the actual connection to the repository like: server URL, connection timeouts, proxies, etc. Connections API
- Can be associated with 1 credential instance.
- Can be associated with 1 connector instance
- workflow
- Same old workflow, this must be configured from scratch on the UI or via REST commands, as this is no longer an xml file. Workflow API
- schedule
- Similar to the "content-source" schedules in Aspire 4.0, it supports time schedules, but also supports the new "sequence" schedules which can trigger crawls after another schedule has been completed. Schedules API
- policies
- New to Aspire 5.0, there are two types of policies Policies API.
- routing
- Determines which worker nodes can receive jobs flagged with certain tags. Must be applied to seeds.
- throttle
- Throttles job batch delivery to worker nodes, allowing the crawl rate to be controlled.
- Can be applied to seeds, connections or credentials
- routing
- New to Aspire 5.0, there are two types of policies Policies API.
- seed
- Starting point of a crawl. Seeds API
- In Aspire 4.0 this was a list of URLs in the same content source, or a file containing all the seed URLs. In Aspire 5.0 each seed must be configured separately, and crawl independently of each other.
- Can be associated with one or more schedules
- Can be associated with 1 connection instance
- Can be associated with 1 throttle policy
- Can be associated with 0 or more routing policies
- Can be associated with 0 or more workflows (will execute sequentially)
What's next?
Overview
Content Tools
Copyright © 2024 Accenture